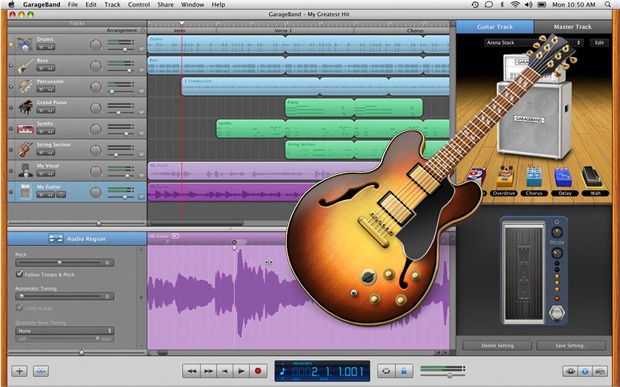
GarageBand is an ideal software package—easy to use, included on every Mac, and capable of editing interviews quickly. The process of editing audio content by editing waveforms is standard across all audio programs. The actual mechanics for making the edit may differ, but every software package will include a way to cut out unwanted material and join the sound you want to use.
This tutorial provides an introduction to audio editing through GarageBand.
You can download the raw file, a rough edit and the finished audio of the file used in this tutorial from the Apple web site. The files are in the right column.
Setting up GarageBand
Open GarageBand.
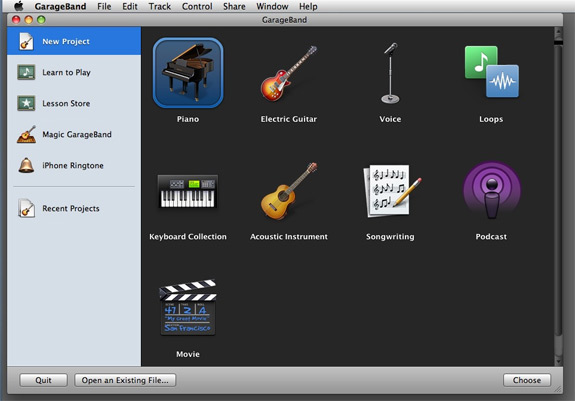
GarageBand requires you to select a project type.
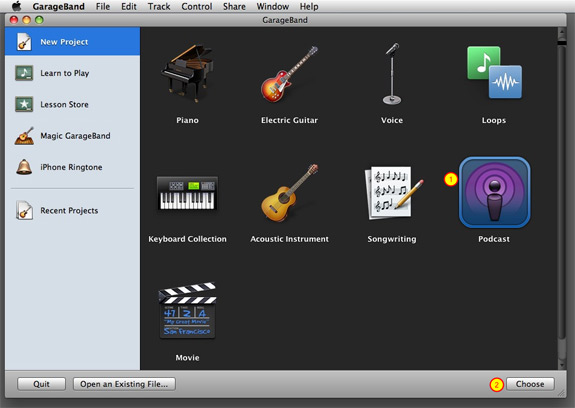
Choose Podcast (1) and click Choose (2).

This is the podcasting screen. The first step is to simplify the interface.
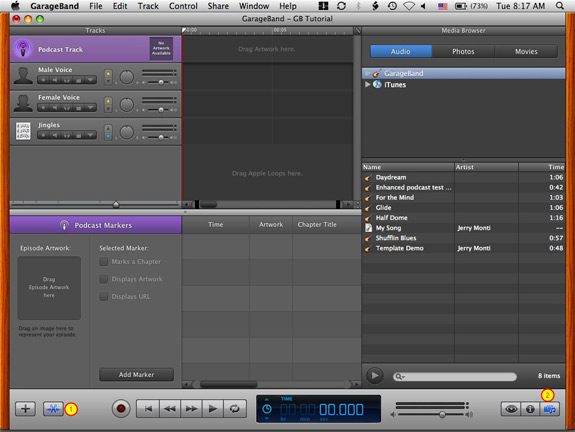
Click the Edit button (1) and the Media button (2) to close those two panels.
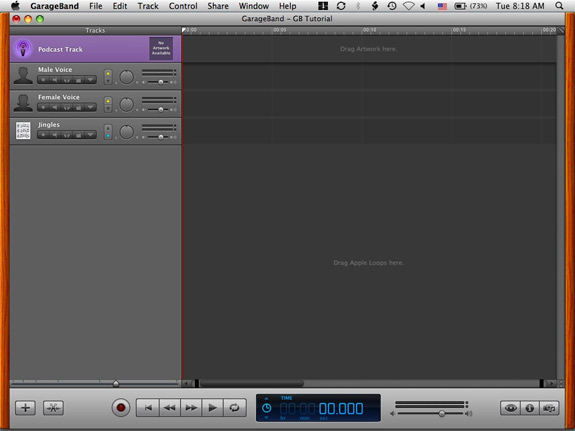
This interface is less complex.
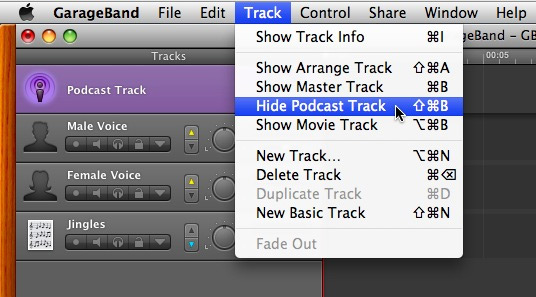
Select Hide Podcast Track from the Track menu.
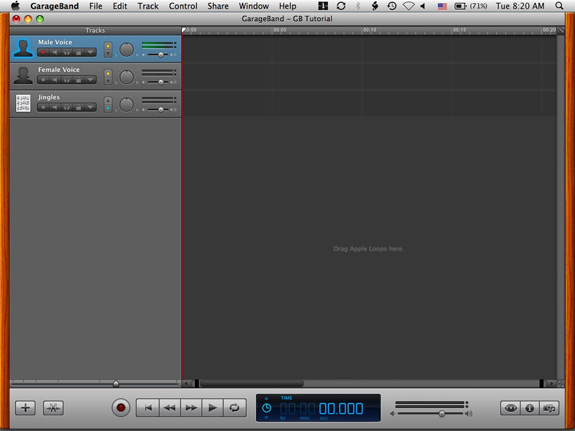
The screen is even less complex.
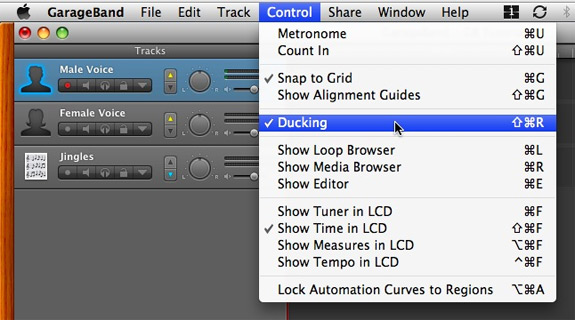
Turn off Ducking. [Ducking is a way to automatically lower the background sound when the foreground sound is louder.]
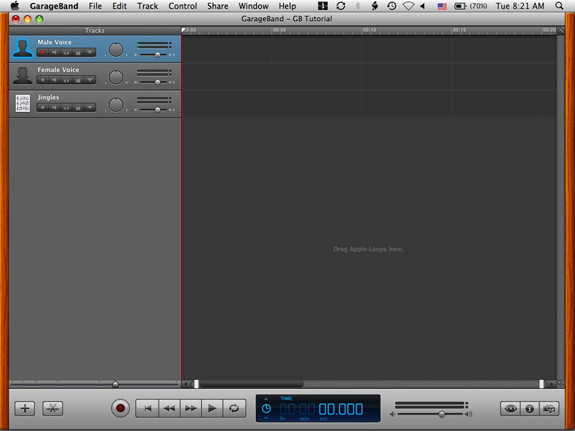
Ducking is off and there are no ducking controls in the track head.
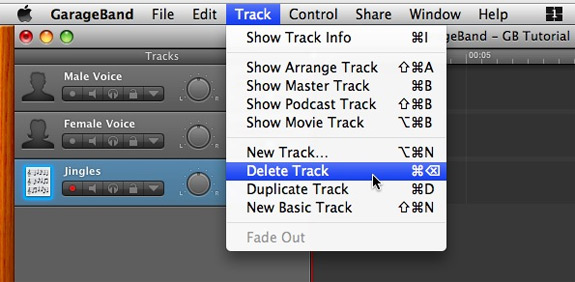
Delete all but one track—GarageBand requires at least one track.

Position the Finder Window containing the audio source files at the top right of the Finder window.
Importing and Editing
After you setup a Finder window in the upper right corner of your desktop drag a single file into a blank spot in Track Head area.

Each file you drag will appear in a separate track.
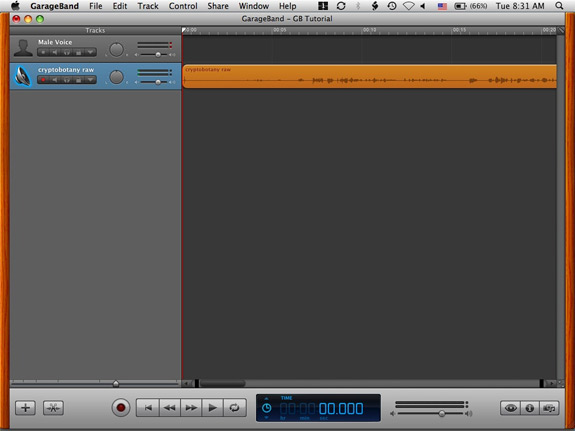
The imported audio will appear in a new track.

The new track will have the imported audio file name as the track title. The track waveform will be orange. The orange track color indicates that this is an imported audio file. Voices and Real Instruments recorded directly into GarageBand are color-coded purple. Midi instruments are coded green. Loops are aqua.
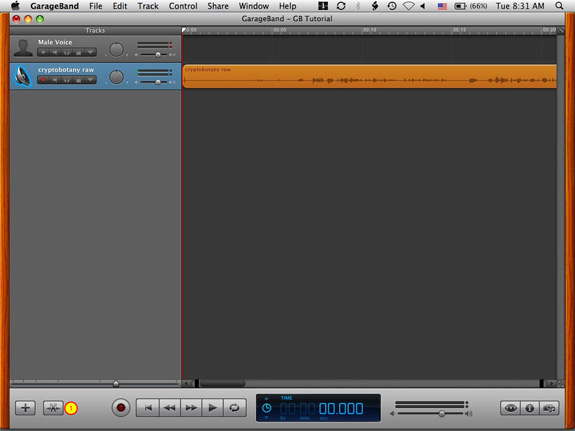
Open the edit panel (1).
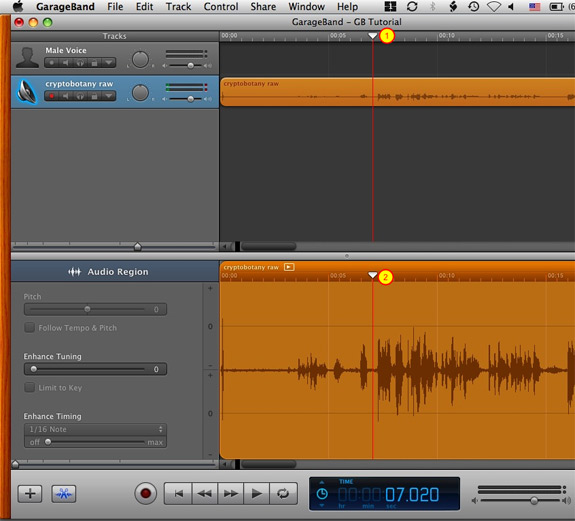
Click the play control or press the spacebar to play the audio. Press the stop button or the spacebar to stop the playhead at an edit point. Note that the playhead in the multitrack view (1) and the playhead in the Editor (2) show exactly the same point on the waveform. The waveform in the edit window is larger and can be zoomed independent of the multitrack view. This permits precision edits on the waveform.
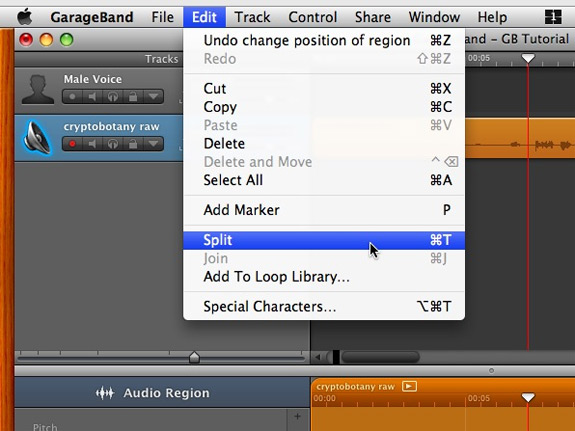
After you select an edit point, select Split from the Edit menu. Note the Command T keyboard shortcut. Most of the work in editing is making cuts.
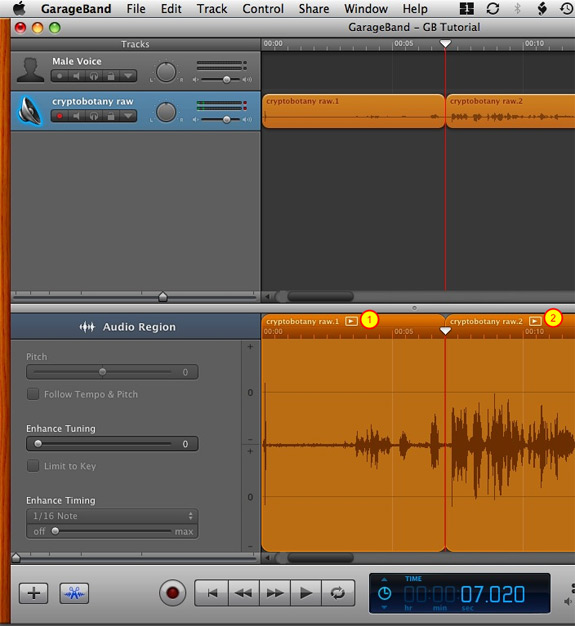
The first edit is complete. Note the left edit has a unique region name—cryptobotany.raw.1—(1) and the right edit has a unique region name—cryptobotany.raw.2—(2).
Now that the first edit is complete, you’ll want to delete the left part of this edit—cryptobotany.raw.1 (1). However, after the edit note that both the left region, cryptobotany.raw.1 and the right region, cryptobotany.raw.2 are highlighted.
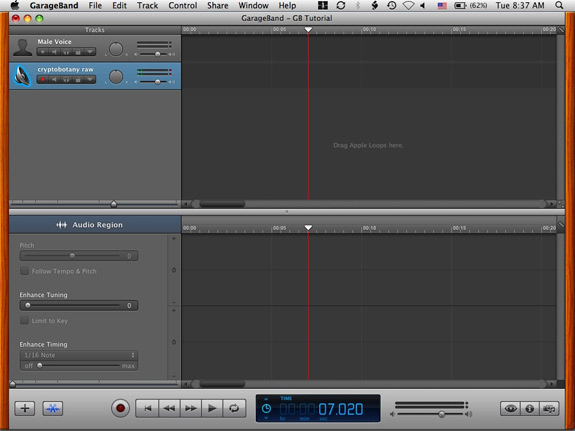
If you hit the Delete key with both regions highlighted the entire track will be deleted. This frequent mistake is easily corrected. Hit the Command and Z key to undo the mistake.
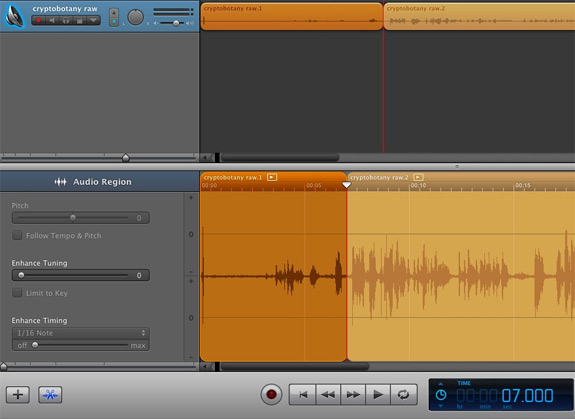
Select just the left region—cryptobotany.raw.1—and press the Delete key.
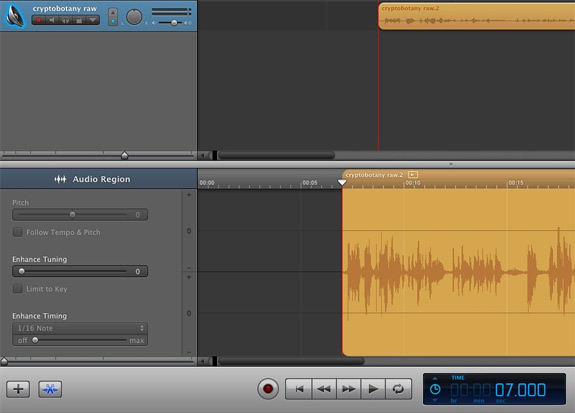
The left region is deleted and the edit is complete.
Here’s an example of garageband’s non-destructive editing capabilities. Press Command and Z to undo the delete. Now, select just the right region—cryptobotany.raw.2—and press the Delete key.
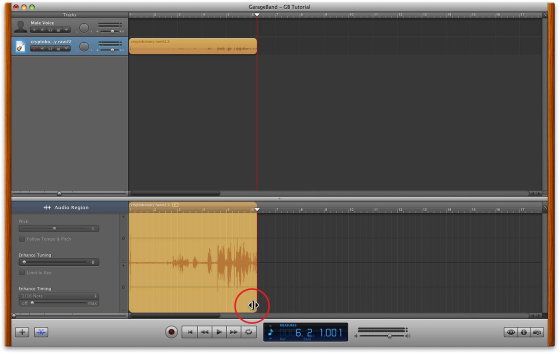
Notice the special cursor that appears when the mouse is positioned over the lower right corner of the track in the precision editing window.
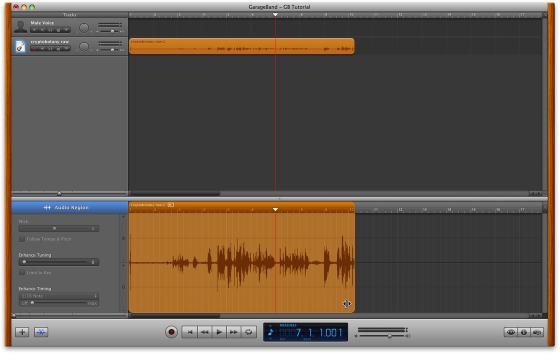
Click and drag the track to the right. The material that was just deleted reappears.
Removing a section in the middle of the track is only slightly more complicated.
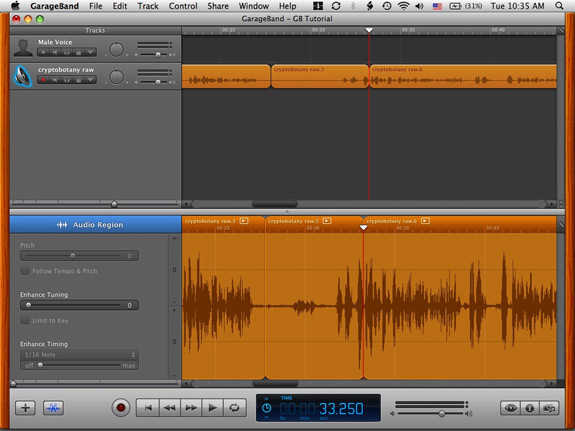
Make a cut (split track) on each side of the sound section that will be removed.
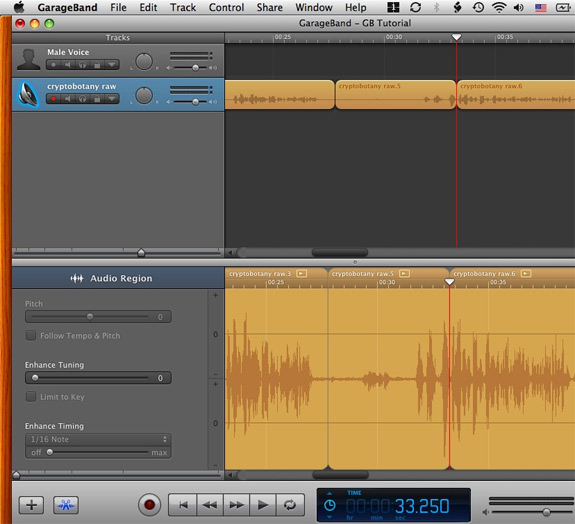
Deselect all track regions by clicking in an empty grey area.
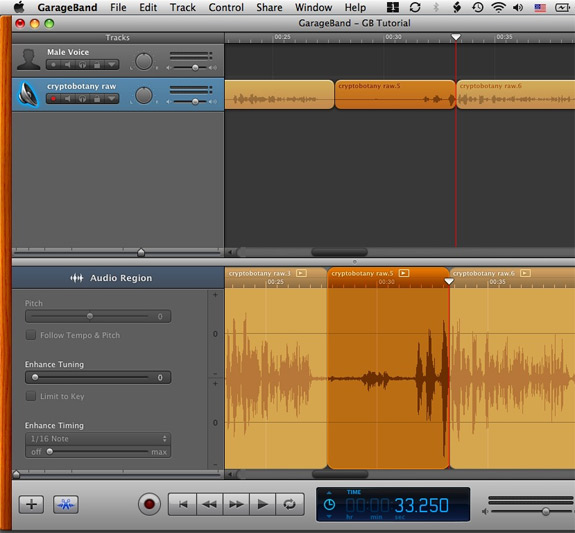
Select the section to delete and press the Delete key.
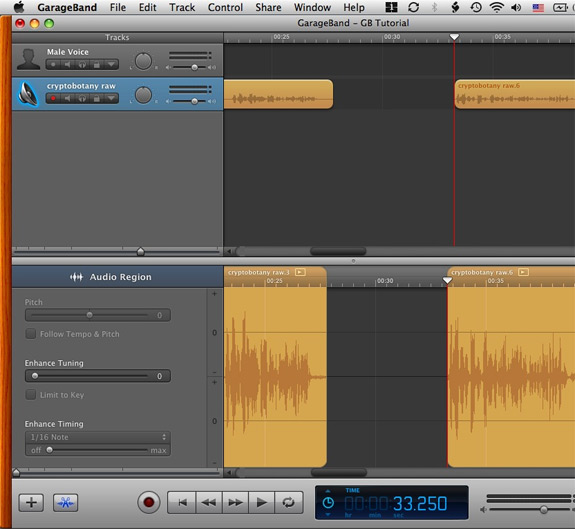
The section is deleted. The next task on the edit is to close the gap between the two remaining regions and join the two regions together.
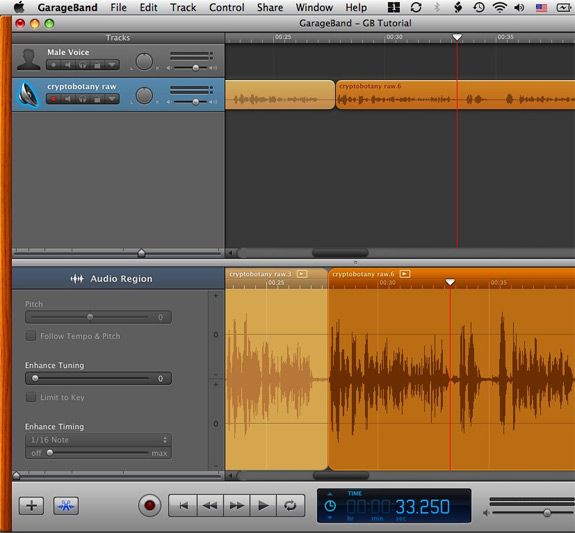
Select the right region in the multitrack (upper) window—you cannot move a region by clicking in the Edit panel—and move the region to the left until it is adjacent to the the left region.
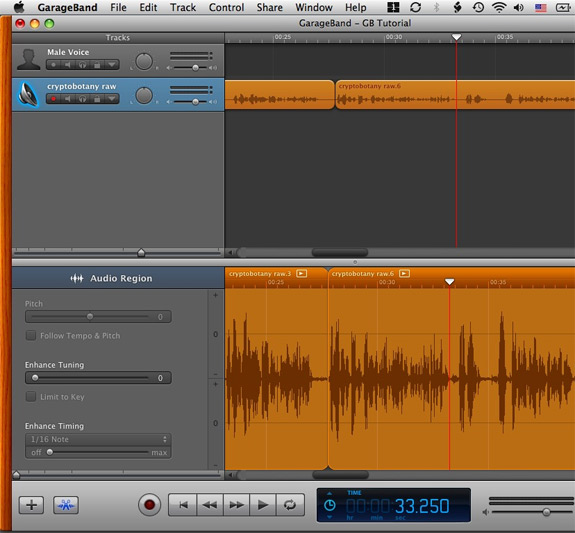
Highlight both the left and right regions.
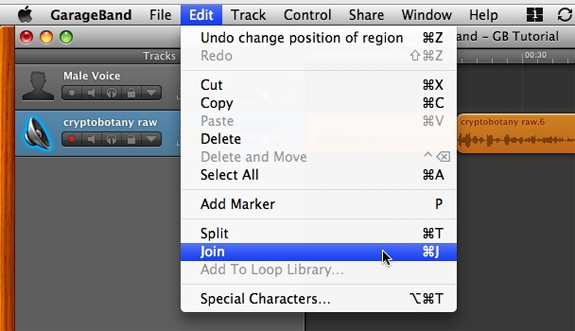
Select Join from the Edit menu.
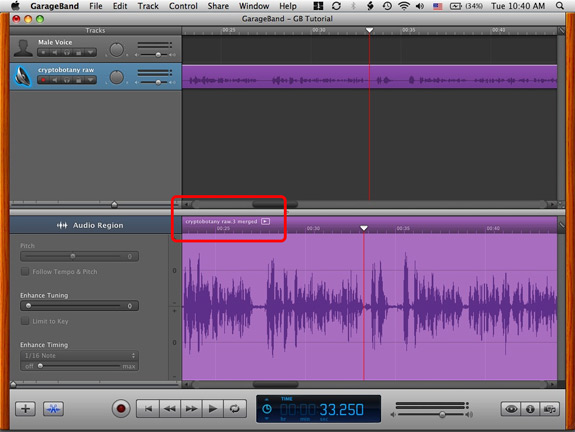
Two important changes occur. First the two regions are joined. The region label reads cryptobotany raw.3.merged. GarageBand has merged the two files and has written a new temporary file. GarageBand can now handle this file in the same way as a sound recorded directly into a GarageBand project.
Editing an interview primarily consists of cutting out reporter questions and removing segments of the interview that are not necessary for the report or project.
Exporting
After finish editing, you need to export the interview.
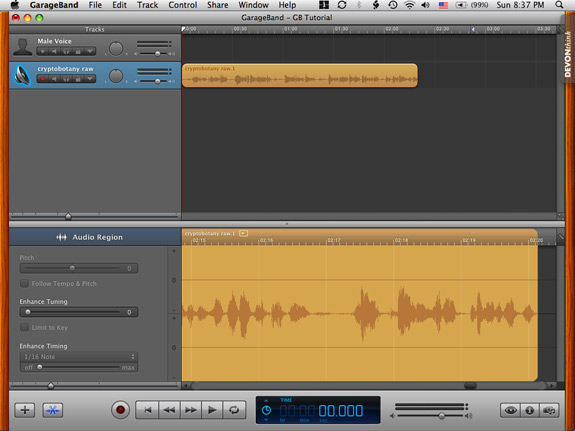
Move the End Marker before exporting.
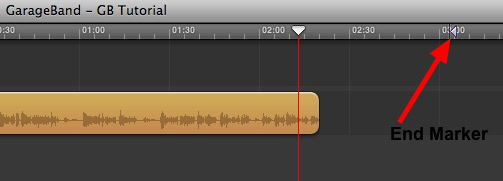
Click the End Marker in the Multitrack window ruler and drag the maker to the end of the interview.
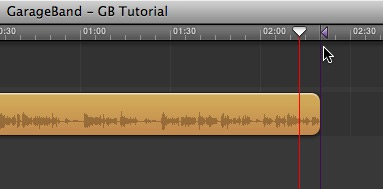
The End Marker is correctly positioned and the project is ready for export.
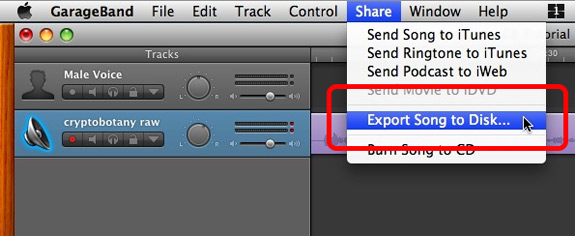
Select Export Song to Disk from the Share menu.
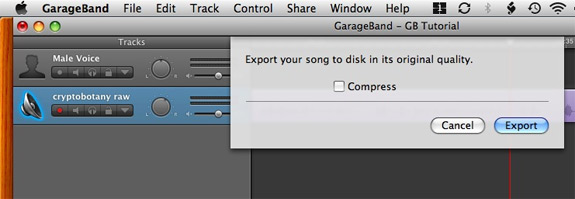
If you are using this sound project in Final Cut Pro or any other program that will import uncompressed sound files, do not check the Compress checkbox.
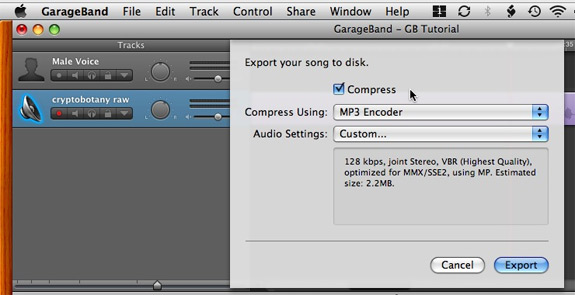
If you are using this sound project in SoundSlides or any program that requires a compressed file, check the Compress checkbox and select the method of compression and the settings. This setting is for Soundslides and is set to the required MP3 file format and uses the 128 kbps setting.
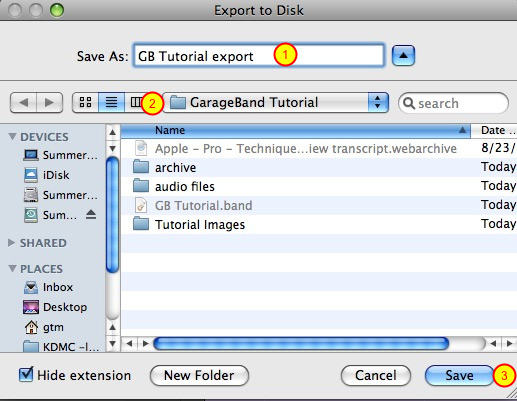
Give the export a name (1) and check the location (2) to make sure you know where the file will be saved. Then click the Save button (3).
About this Tutorial
Jerry Monti is a technology trainer for the Knight Digital Media Center.
Republishing Policy
This content may not be republished in print or digital form without express written permission from Berkeley Advanced Media Institute. Please see our Content Redistribution Policy.
© 2020 The Regents of the University of California

