Zoom H5 Audio Recorder
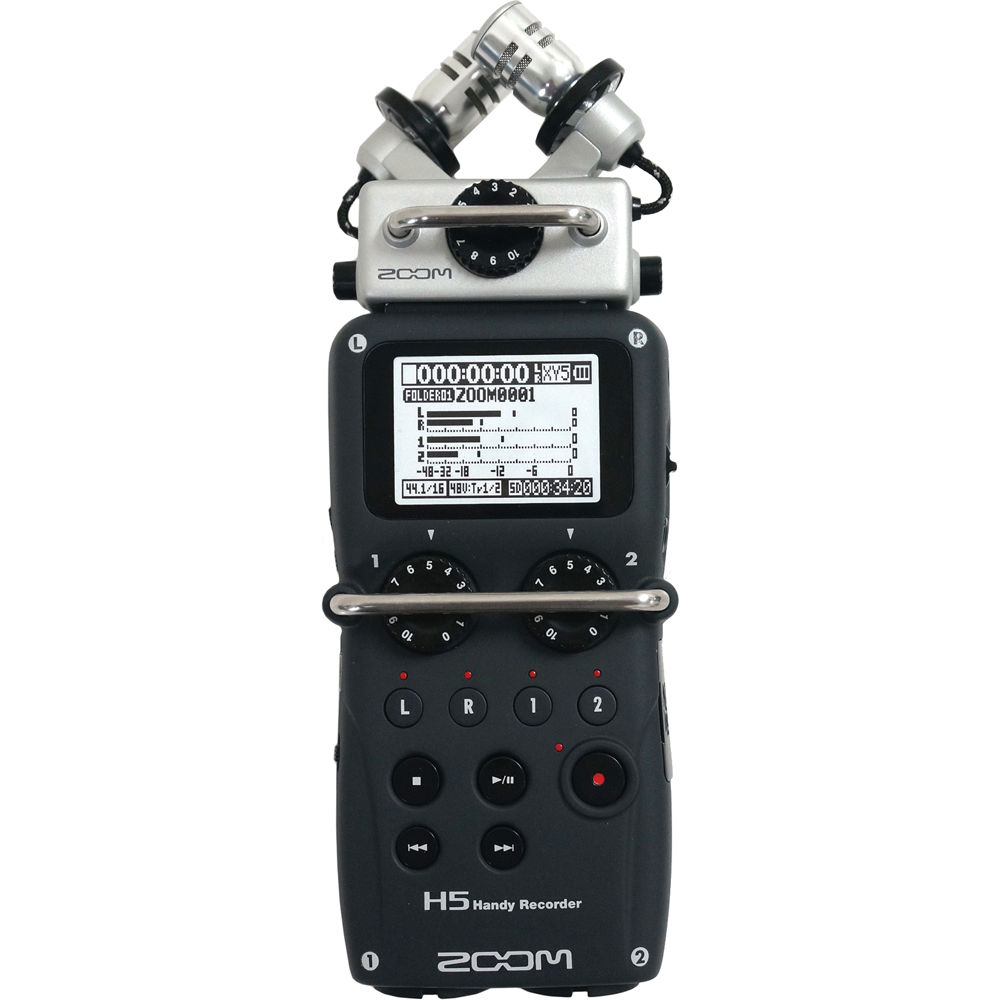
The Zoom H5 is a digital audio recording device that saves audio onto a Secure Digital High Capacity (SDHC) card – the same kind of card used with most digital cameras.
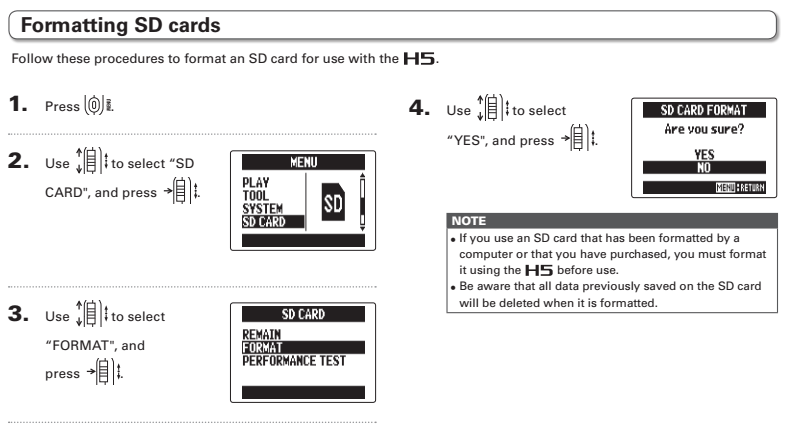
Step 1: Supplying Power
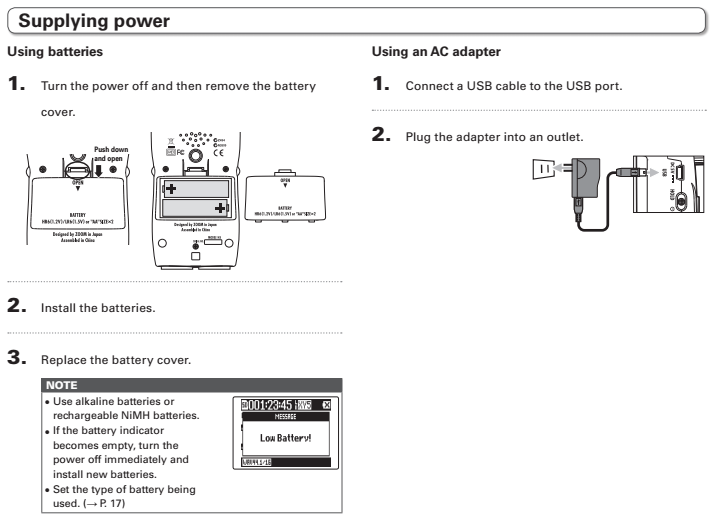
The Zoom H5 has no internal battery source. You have two choices: AA batteries or plugging the recorder into the wall.
Step 2: Insert an SD card
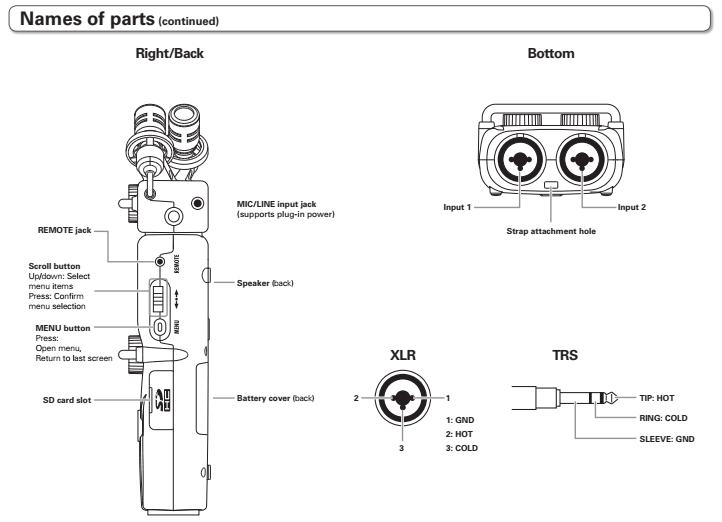
Load the card into the slot on the righthand side of the device.
- Make sure the recorder is OFF
- Open the door on the side labeled “SD.”
- Looking at the front of the recorder, insert the card face up.
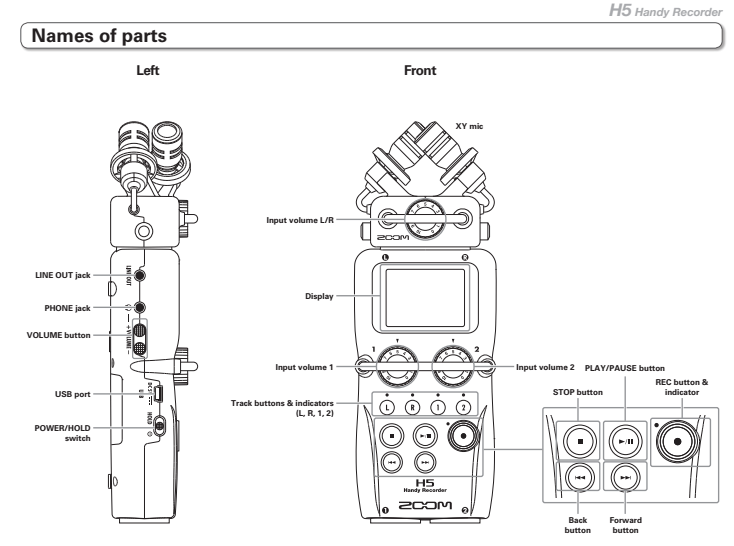
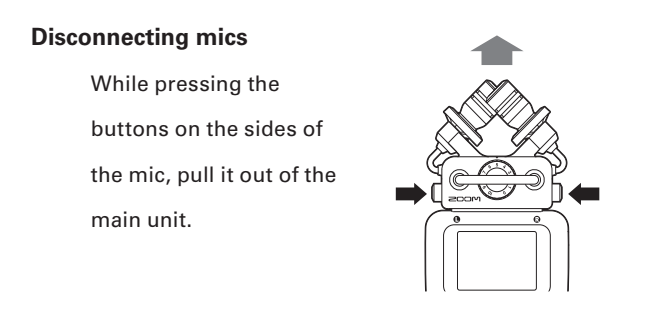
Step 3: Connect your microphone
- The Zoom comes with an XY cross-directional microphone on the top of the recorder. The problem is this microphone is not suitable for interviews or capturing single, isolated sounds (it’s better suited to recording musical instruments or performances).
- You want to control your recordings as much as possible, so you’ll remove the mics on top of the recorder and plug in an external microphone.
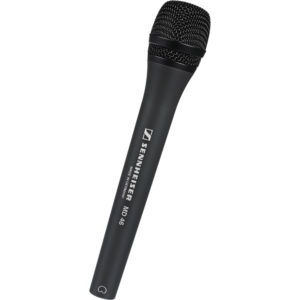
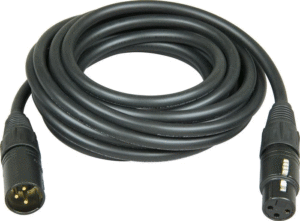
Inputs 1 & 2 are built for a three-pronged input cable called XLR. The handheld microphone comes with an XLR cable that attaches from the bottom of the mic to Input 1. Connect the reporter mic to the Zoom using the XLR cable.
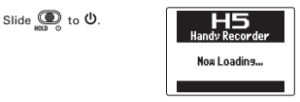
Step 4: Turn on your recorder.
Step 5: Format your SD card.
It is important to format your SD card before recording to ensure that it is clear of other data and compatible with the Zoom. Note: Formatting erases all current data. Verify that all important contents are accessible at another location (your computer, external hard drive, etc.) before formatting.
Step 6: Set recording mode.
In most cases, you’ll want to select “Multi File.”
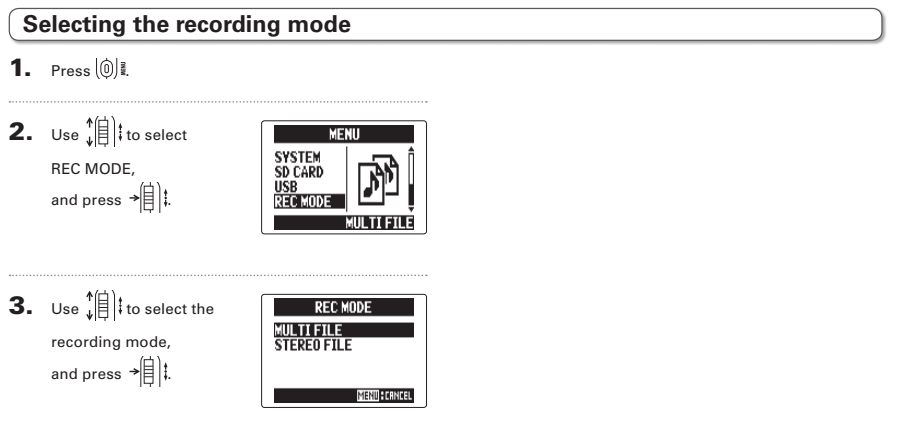
Then tell the recorder to record in 44.1khz/16 bit.

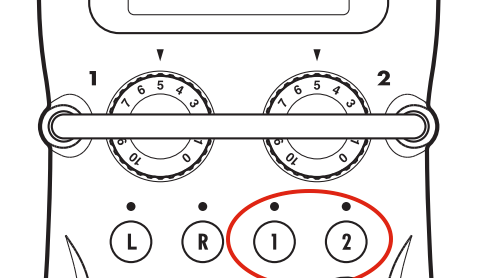
Step 7: Select the input.
To make sure the recorder is set to record through the external microphone, make sure the Inputs 1/2 are selected. Press these buttons:
Step 8: Put on your headphones.
You’ll find a pair of headphones in your Zoom kit. Plug them into the headphones jack on the left side of the device.
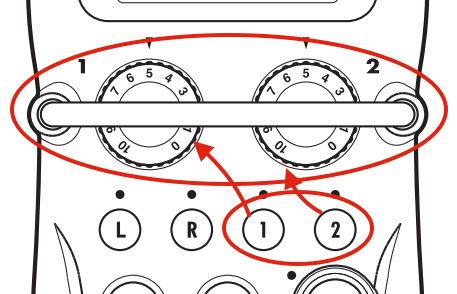
Step 9: Monitor the levels.
- Press the red record button to begin monitoring levels (pressing twice starts the recording).
- You adjust the levels with the input volume wheels on the front.
- Input 1 corresponds to the left wheel, and Input 2 corresponds to the right wheel.
- You want to adjust the volume of the input so that the level stays around -12dB.
- Be sure to test the levels when your interviewee is speaking at a natural volume.
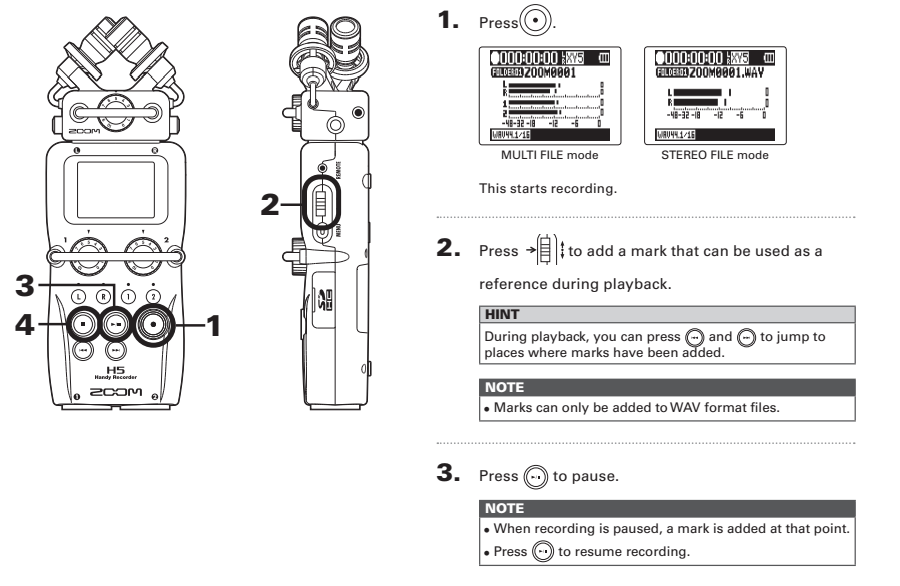
Step 10: Start recording.
To start recording, press the red button two times. If you press only once, you will see a blinking light, and you will be in “record pause” – in record pause, you aren’t yet recording. Make sure you press the button twice and see a steady red light. You’ll see the timestamp on the screen start to advance.
Republishing Policy
This content may not be republished in print or digital form without express written permission from Berkeley Advanced Media Institute. Please see our Content Redistribution Policy.